

As I am sure you know by now, I have recently move to New York, and although I do have my savings, it was never my intention to live off that, so as soon as I landed the job hunt was on! A week in, and I landed my first NYC job. Now, even though it's not in the Condé Nast building, it is in the way-über-trendier-than-me Soho. And I'm not stating that my outfit or makeup were the main reasons why I got the job, but I still wanted to dedicate a post on the subject and include a few tips on interview approved makeup.

1. Don't try anything new or crazy. Stick to your fool proof products and looks because the last thing you need to worry about is if that new concealer is fading (revealing any blemishes) or if that new lipstick is bleeding (or even worse, stuck to your teeth).

2. Perfect your base. Instead of focusing on a really dramatic/smoky eye, I really like to take the time to prime my face with the Benefit POREfessional and blend out my foundation perfectly. I use a buildable, yet non-caky base, like the Chanel Vitalumiére Aqua or Laura Mercier Oil Free Tinted Moisturizer, just in case I feel like adding a second layer for more coverage. Then, I go in with my trusty concealer (yeah, you know the one!) and instead of just slapping it on, I use a small brush to pin-point conceal (a la Lisa Eldridge) any blemishes, redness, and of course my dark circles, which I can't allow to see the light of day. Next, I make sure to set everything with a translucent powder because I'm sure nobody wants to hire a grease-ball. Finally, add a subtle tone blush (don't get all Steven King IT) and complexion done!
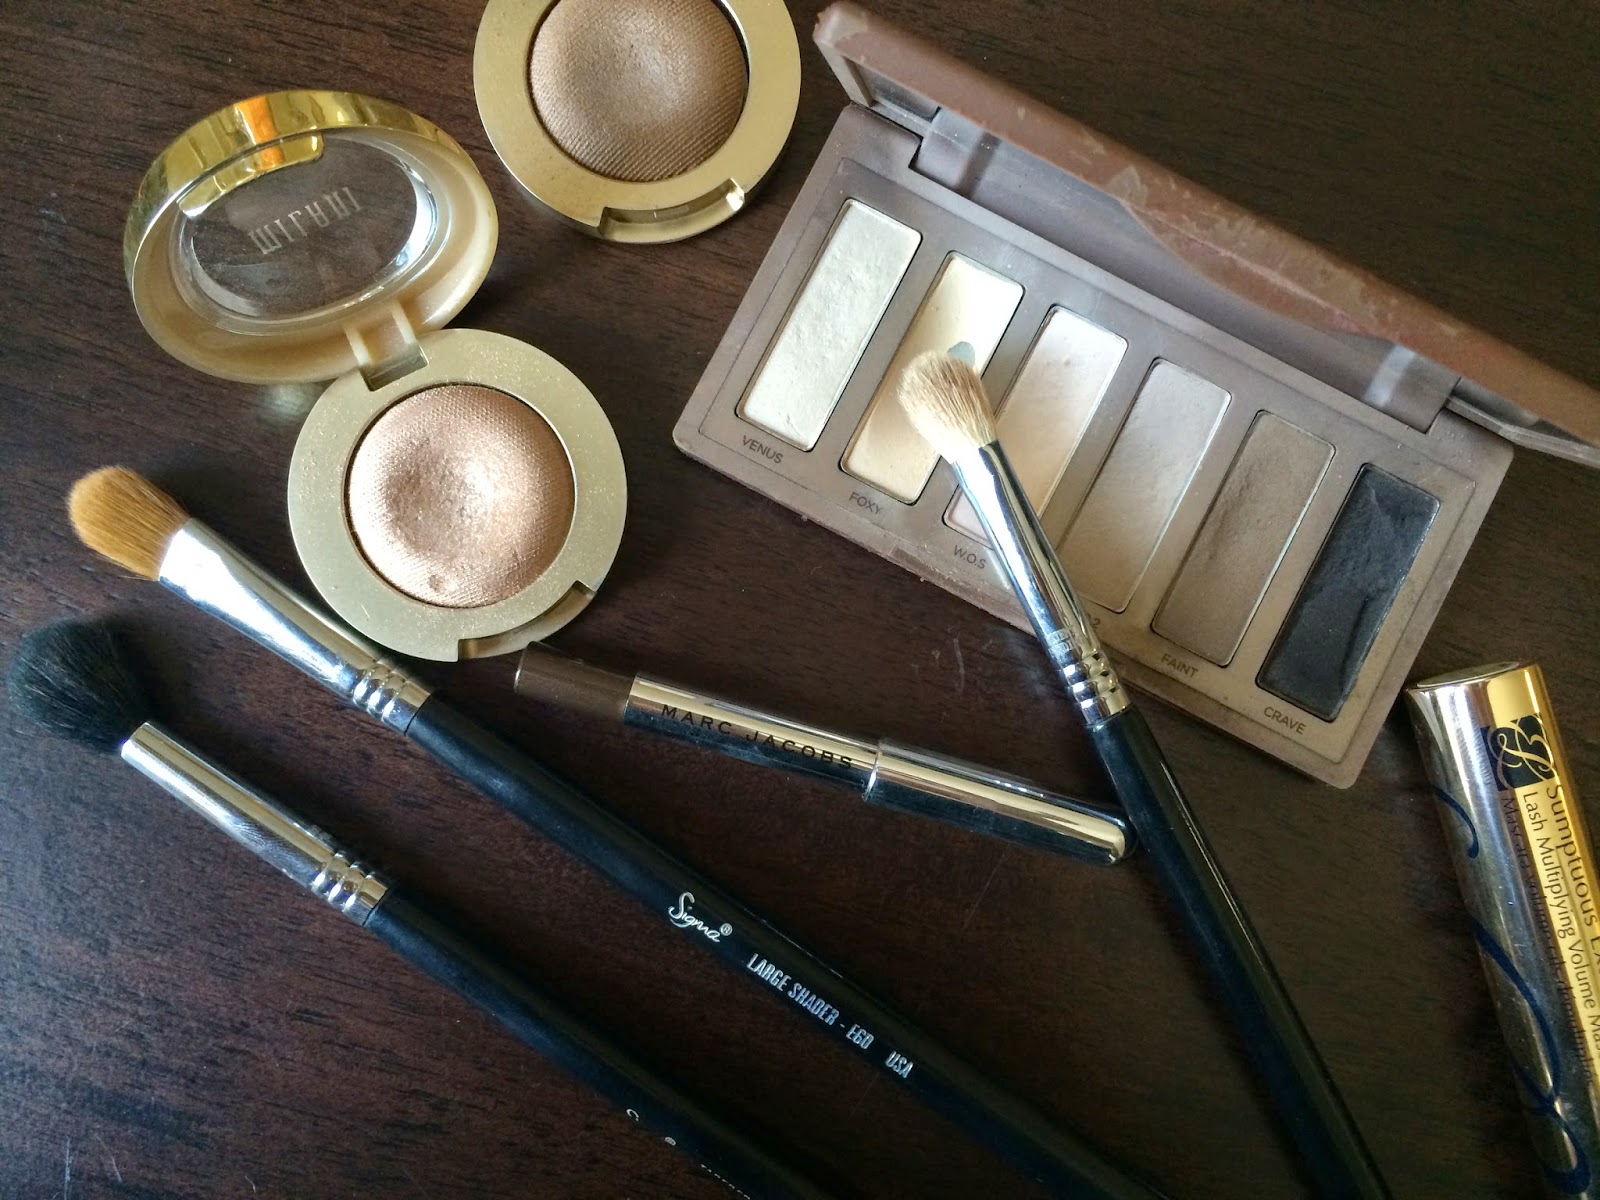
3. Tone down the eyes. Every work environment is different, but always professional; if not, then that's not a job worth having. Try to use matte (or satin) finish neutral shadows, like the ones in the Urban Decay Naked Basics Palette (and they just came out with the second one!) or the Milani Bella Eyes Single Eyeshadows. I know they're very irresistible, but avoid overly shimmery shadows.
-Apply a medium toned matte brown on the crease and outer conner with a fluffy blending brush like the Sigma E25 to add depth. Then, pat in a matte or satin finish champagne (or a shade as close to your lid color as possible) with a dense brush on the center and inner lid. Finally, give everything one final blend with a clean blending brush(when it comes to shadows blending is key).
-Do not (I repeat DO NOT) attempt to do a cat-eye unless you've got your technique down. You'll just get frustrated (the last thing you need before an interview) because it won't turn out the way you want, and perhaps even ruin your eyeshadow. Instead, go for a simple, no muss no fuss line to define the lashes and lots of voluminous mascara. If you do have your cat eye down (you go Glen Coco!), I'd recommend the Stila Stay All Day Liquid Liner. The great thing about it, other than it's über easy and stays put all day, is that it comes in so many colors! You can go for the classic black, or tone it down slightly with a brown. You can also go for a liner like the Marc Jacobs Highliner Gel Eye Crayon and smudge it out to a cat eye with an angled brush. This way you still achieve your cat eye, but with a less harsh line. You can try both these liners, plus four more including NARS and Urban Decay, for $30 if you shop the Sephora Draw the Line value set!
-Last but certainly not least, finish off with natural looking brows. You don't have to go all Cara Delevingne, but my dynamic duo for polished brows would have to be the Anastasia Brow Wiz followed by the Benefit Gimme Brow Gel.

4. The Lips. Even though I myself am sometimes torn between reaching for my Sephora Matte Lip Cream, a classic red, or a nude, I always go for the nude. Although a red can be very beautiful and eye catching, personally, I feel that it's best reserved perhaps for a second interview or a first day. A nude, like MAC Kinda Sexy, Velvet Teddy, or even Patisserie, will go perfectly with your simple eye, and won't distract from what you are saying throughout the interview. If you still feel the need to go for a red, go for more toned down red like NARS Lip Pencil 'Walkyrie'. You can also go for a lip liner like (you guessed it!) MAC Whirl with a matte lip balm on top.
5. The Hair. Needless to say you should go in with freshly clean locks, or at the very least make sure they don't look greasy by using a dry shampoo. As far as a hairdo, you can be a little more inventive/creative than with your make up. Even so, if you are someone who tends to play with their hair a lot (especially when you are nervous), I'd recommend having it tied up. Whether it's a sleek pony tail, french braid, or bun, make sure your hair is out of the way; this way you are not constantly touching it or worried about how it looks and instead are concentrated on the questions. To be honest, I'm not the best at hairstyles, but HeyKayli has you covered!
Now that your makeup and hair are covered, and you are feeling pretty/comfortable, you can focus on what's important: convincing your interviewer that you're the best person for the job! Remember to stay calm and collected. A little bit of nerves is good, but too much can make you mumble your words and make you seem unprepared. Just relax and let your personality knock them off their socks!
I hope today's post was helpful in some way because I know first hand how terrifying interviews can be. Let me know in the comments how you get ready for an interview and if you have any more tips to add on to today's post!
Thanks for reading!
No comments:
Post a Comment